
In this five-part tutorial, I’m going to show you how to deploy a Django application to DreamCompute on Ubuntu with Apache and an SSL certificate.
To follow along with this tutorial, you must have a registered DreamHost account. You can register for a new account here.
Creating Our DreamCompute Account
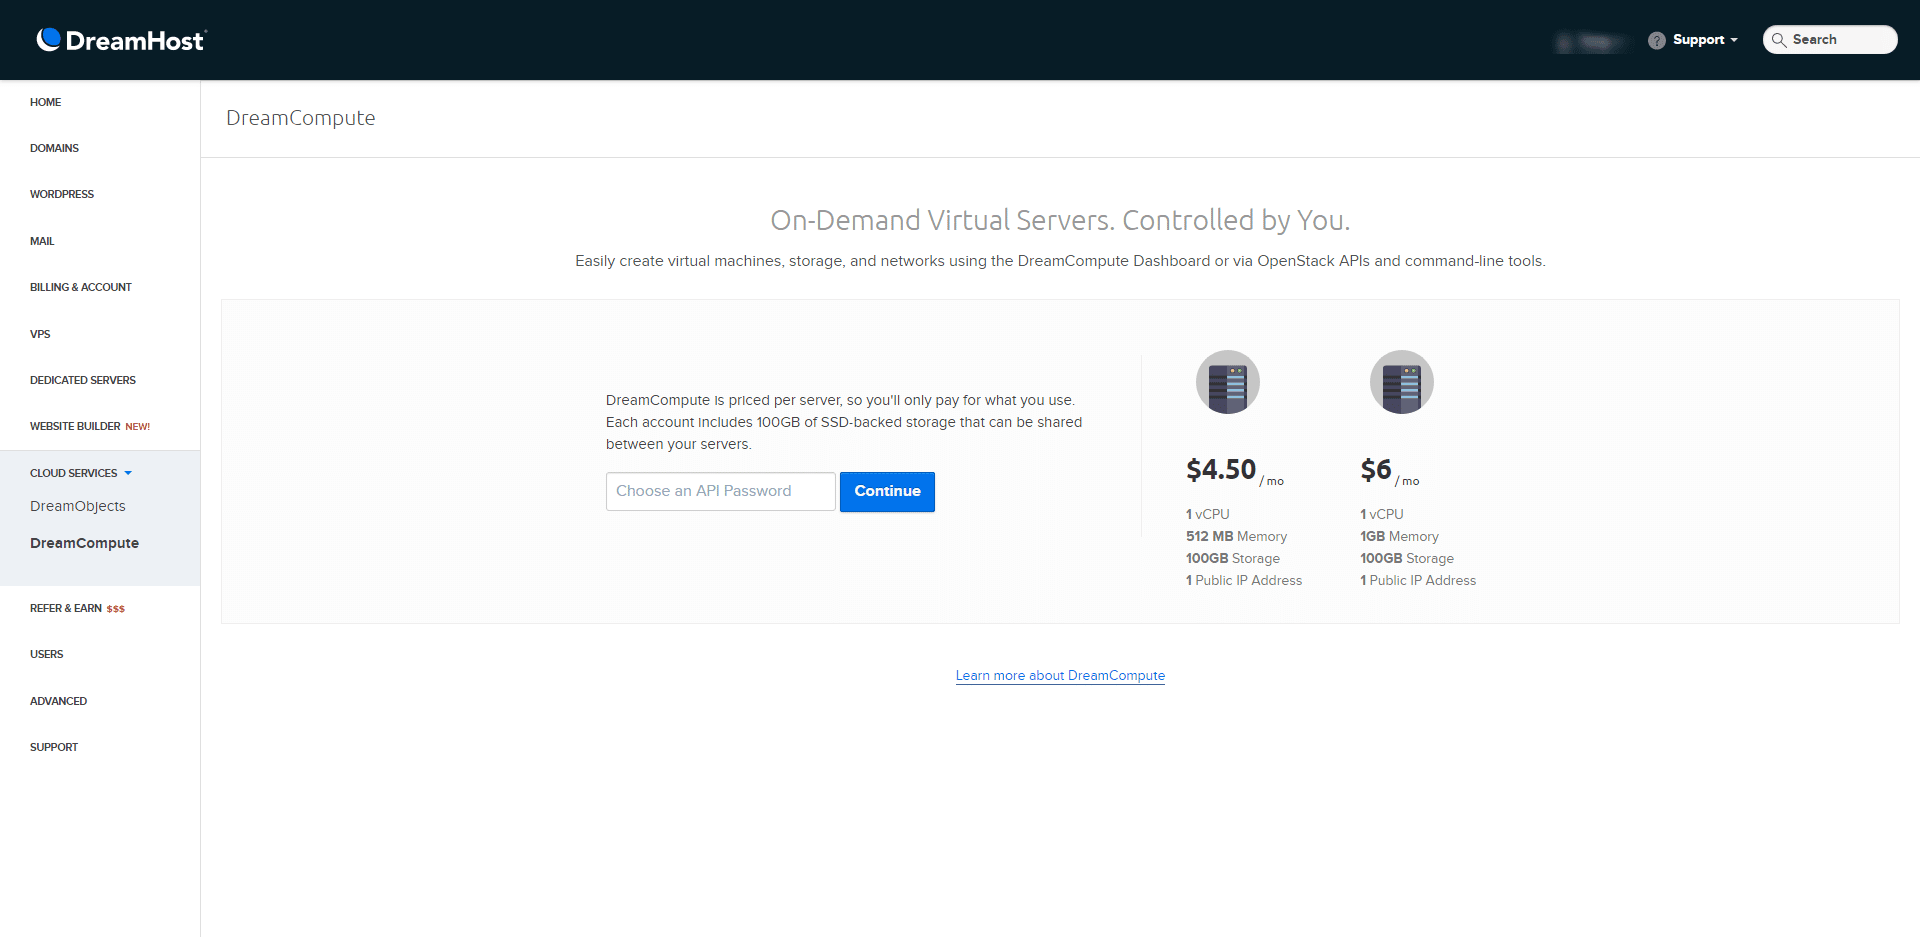
To deploy our application to DreamCompute, we first must set up our new DreamCompute account. If you already have one, you can log into DreamCompute here.
To set up a new DreamCompute account, log into DreamHost and click on DreamCompute option under Cloud Services on the left-hand sidebar.
If this is your first time setting up DreamCompute, you’ll be prompted to choose an API password before you continue. If this is not your first time and you’ve already had an account made, click on the View Dashboard button. Clicking on View Dashboard will redirect you to the DreamCompute login page.
Launching a New Instance
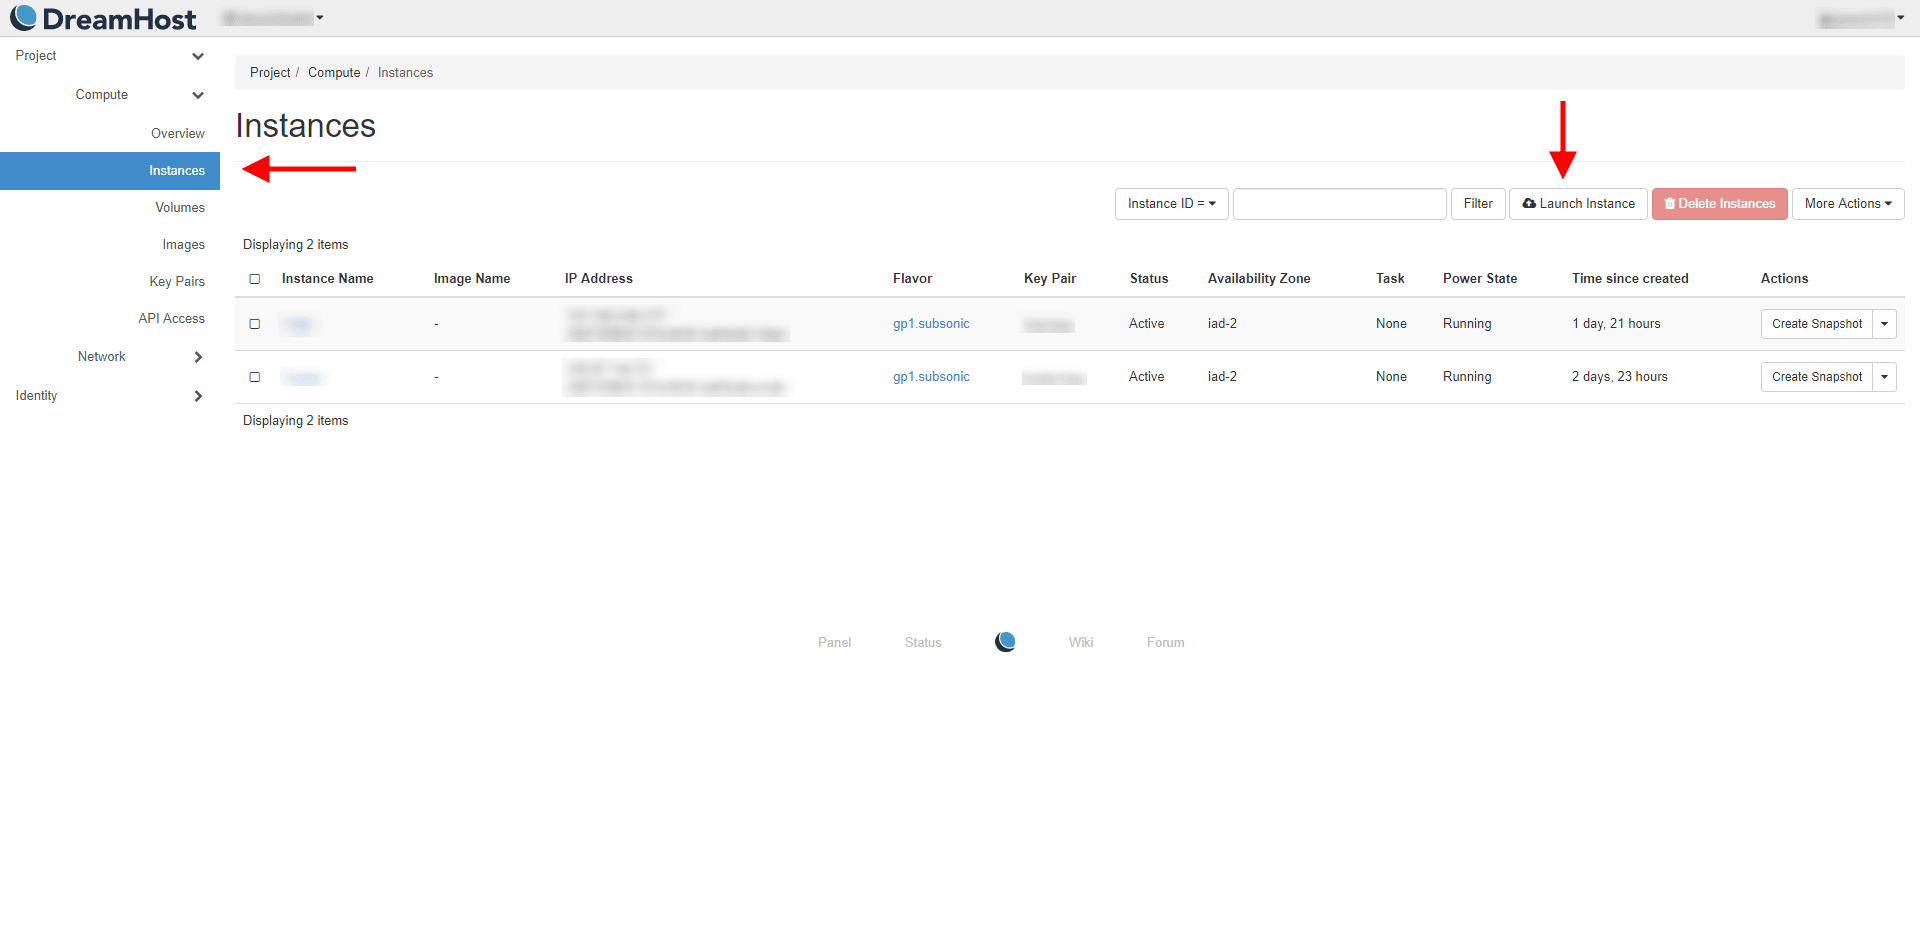
Once you log into DreamCompute, the next step is to create a new Instance for our Django application. Click on Instances on the left-hand sidebar. Then click on the Launch Instance button in the right-hand side.
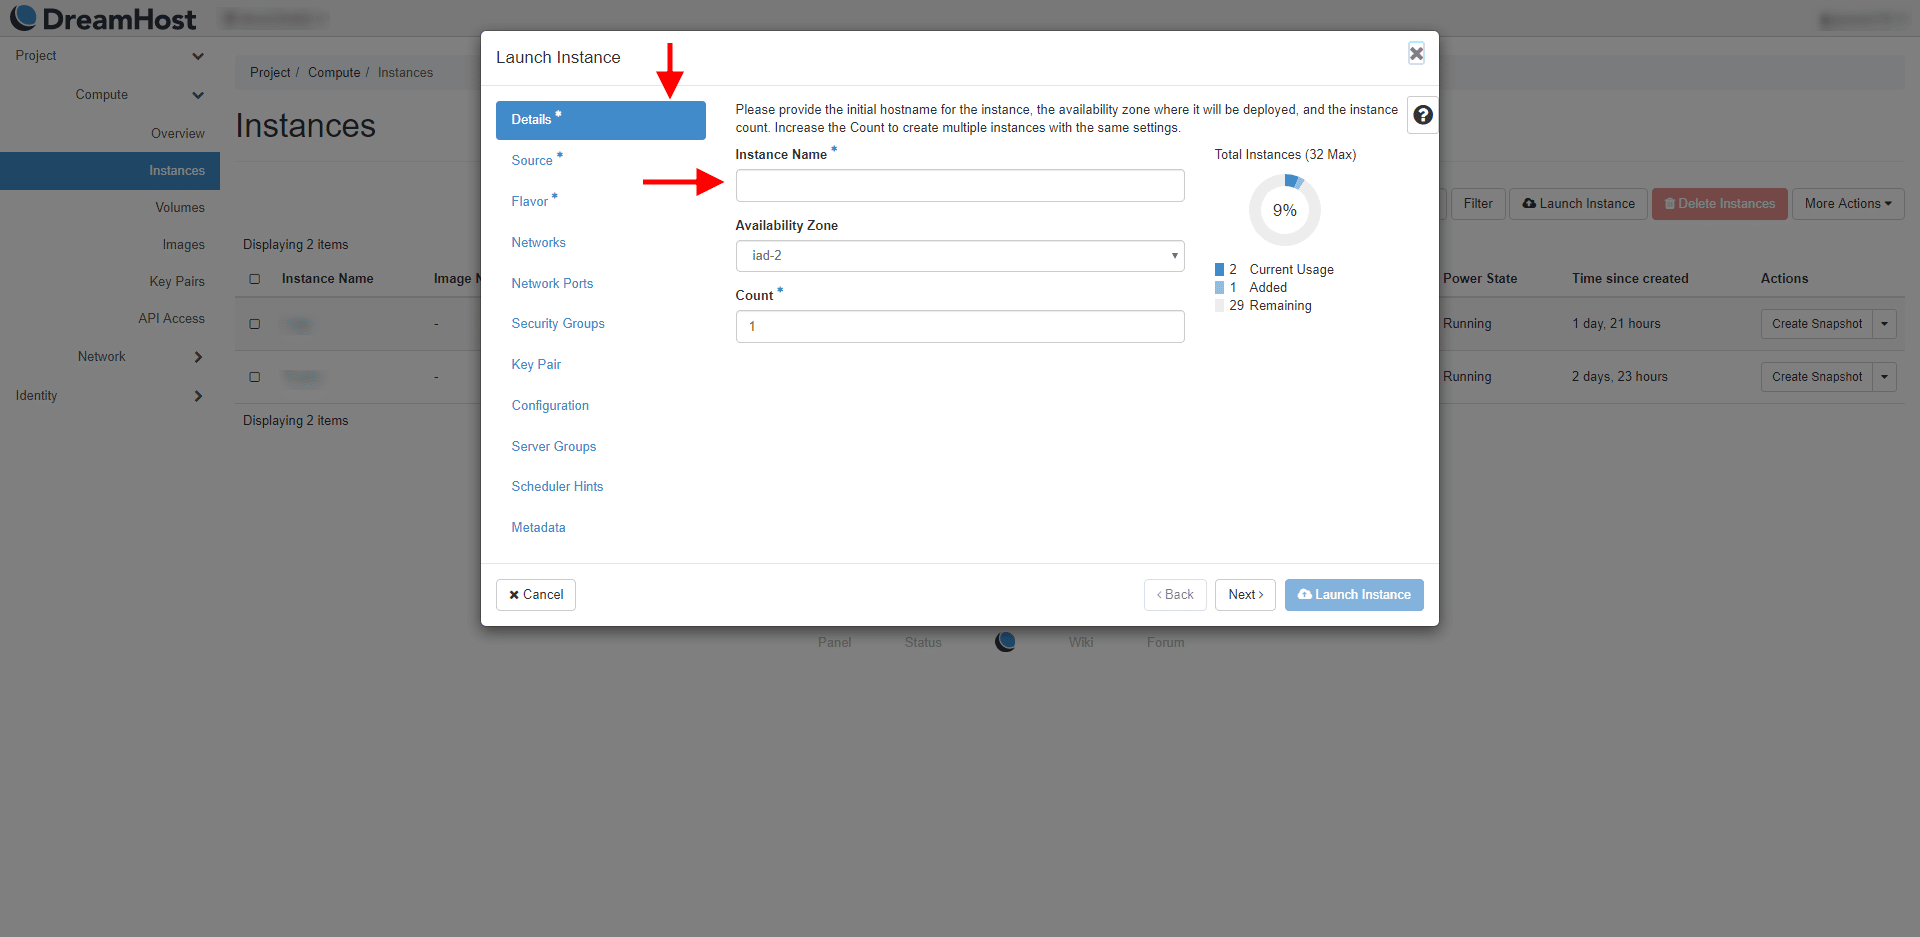
A modal will pop up asking you to fill in some details before you can launch your Instance. By default, you should be on the Details tab. On this tab, the only thing you would need to fill out is the Instance Name.
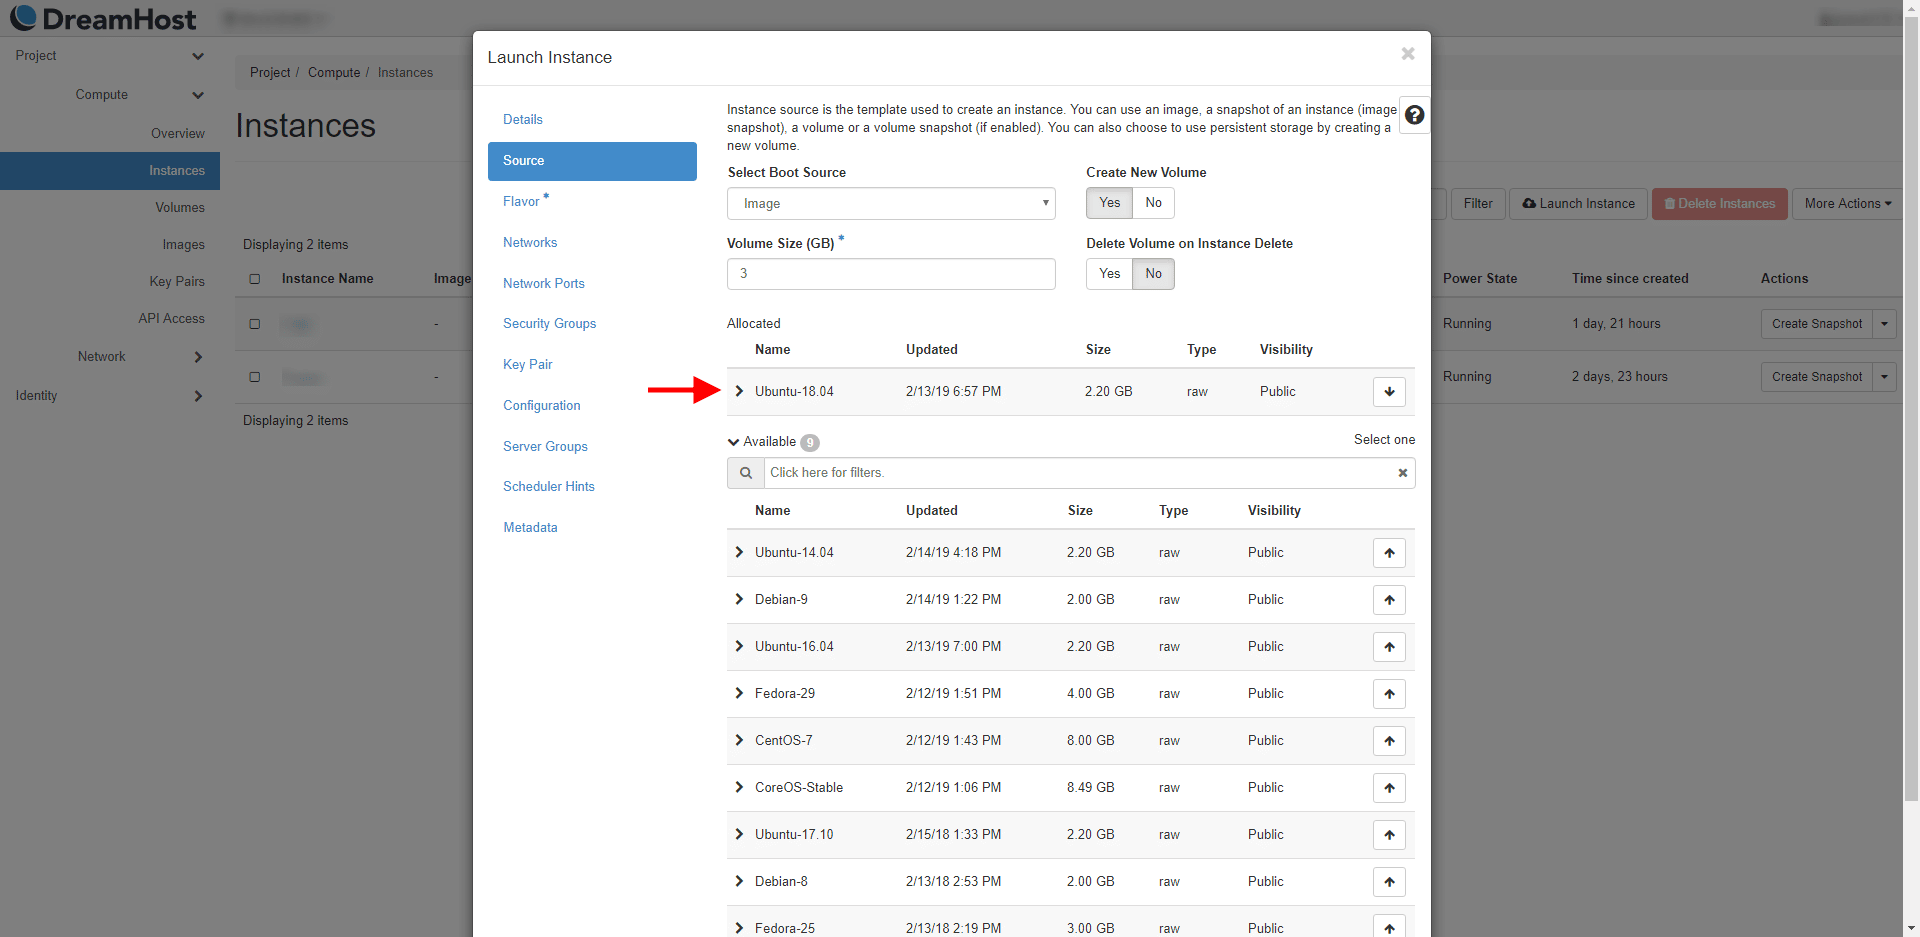
After you’ve picked a name for your Instance, the next thing you’ll need to do is select a Source. Click on the Source tab and select Ubuntu-18.04, or any of the other options you may prefer.
Note: Please keep in mind Ubuntu-18.04 is the selected source for this tutorial. Directions may vary based on your chosen preference.
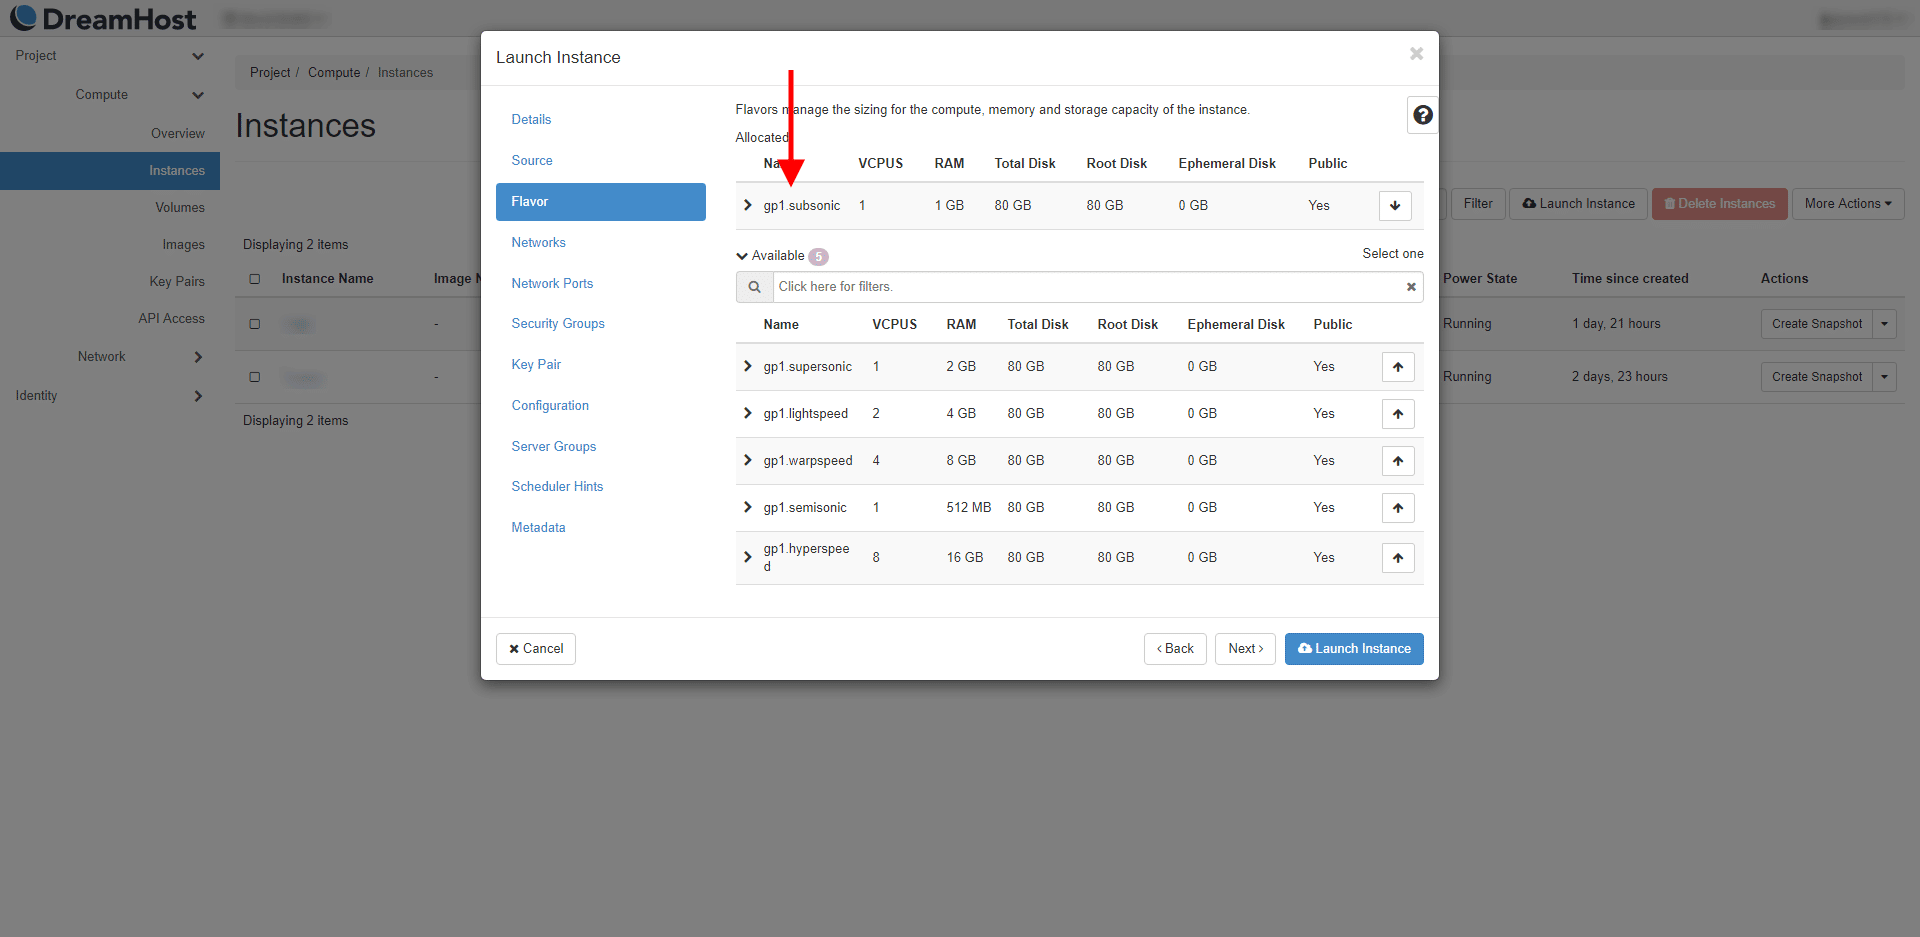
Once you’ve selected a source, you’ll next need to pick a Flavor. For this tutorial, we’ll be using gp1.subsonic. Choose a preference based on your application needs.
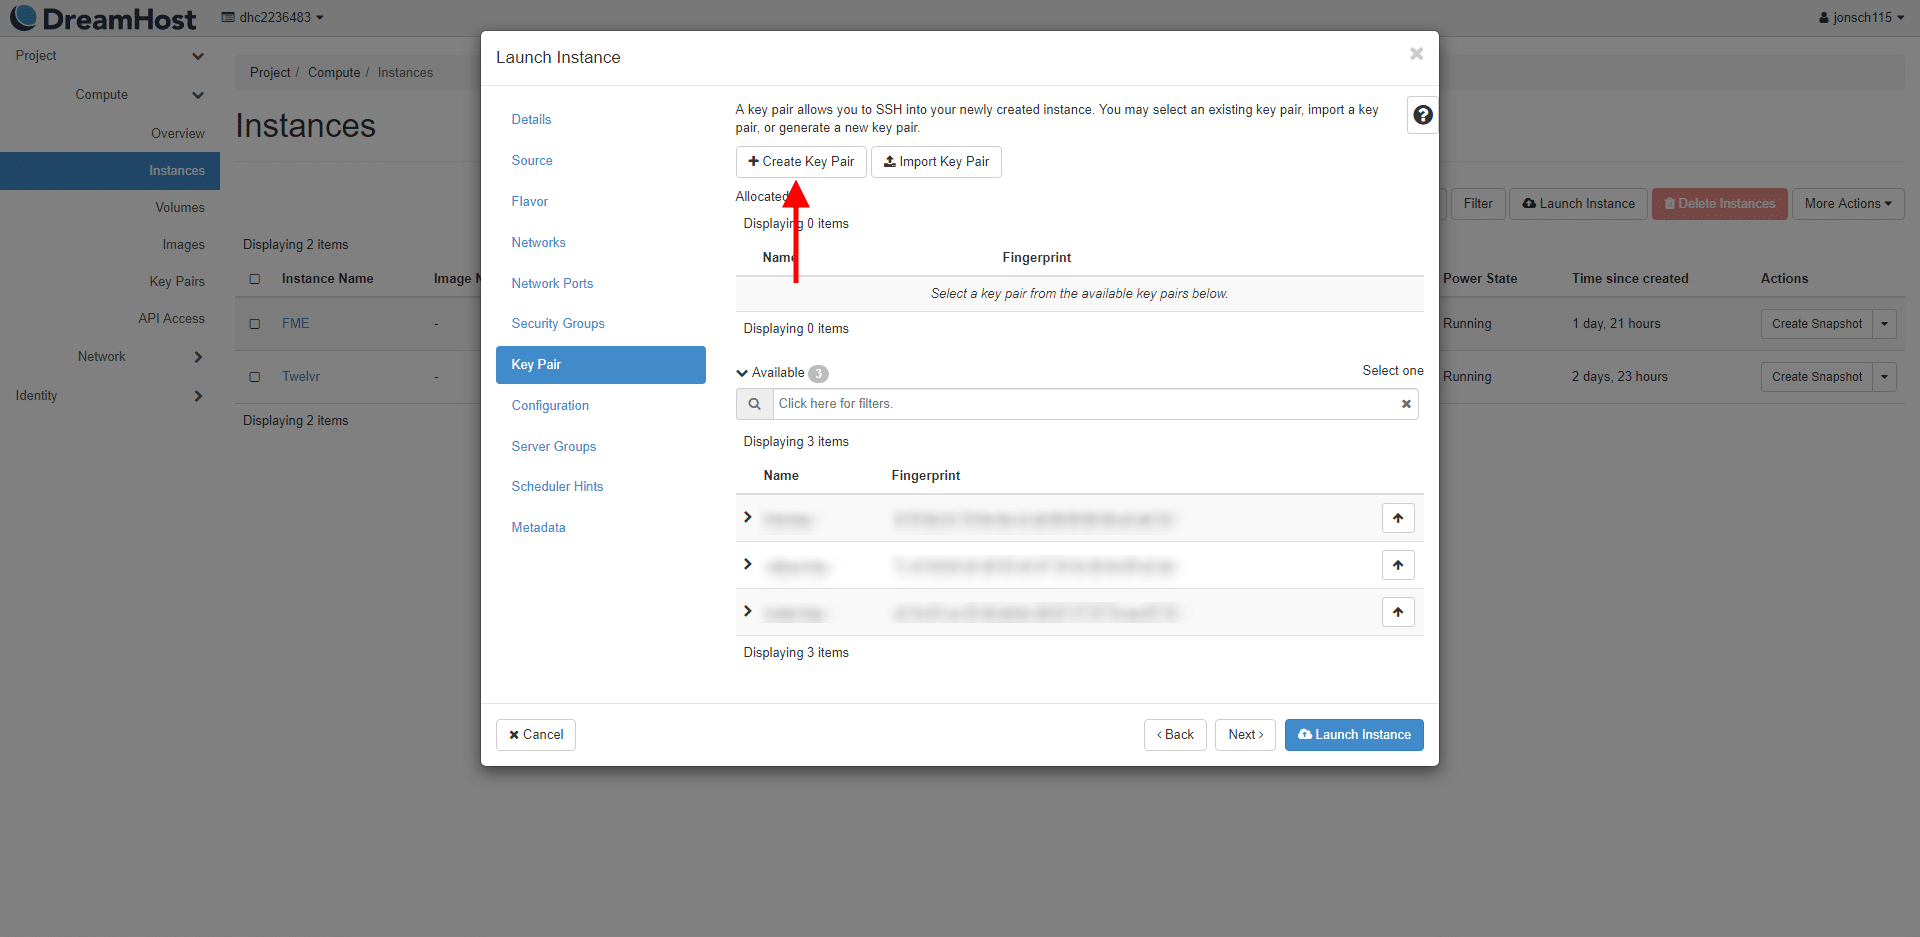
The last thing we’ll need to do before you’re able to launch your Instance is setting up a Key Pair. The Key Pair will grant us access to the system’s Shell and SFTP.
To create a key pair, click on the Key Pair tab then press the Create Key Pair button on the top.
Another modal will pop up asking you to give your key pair a name. Once you’ve given your key pair a name and save it, a file with a .pem extension will save to your computer. Keep this file safe as we will be accessing this later.
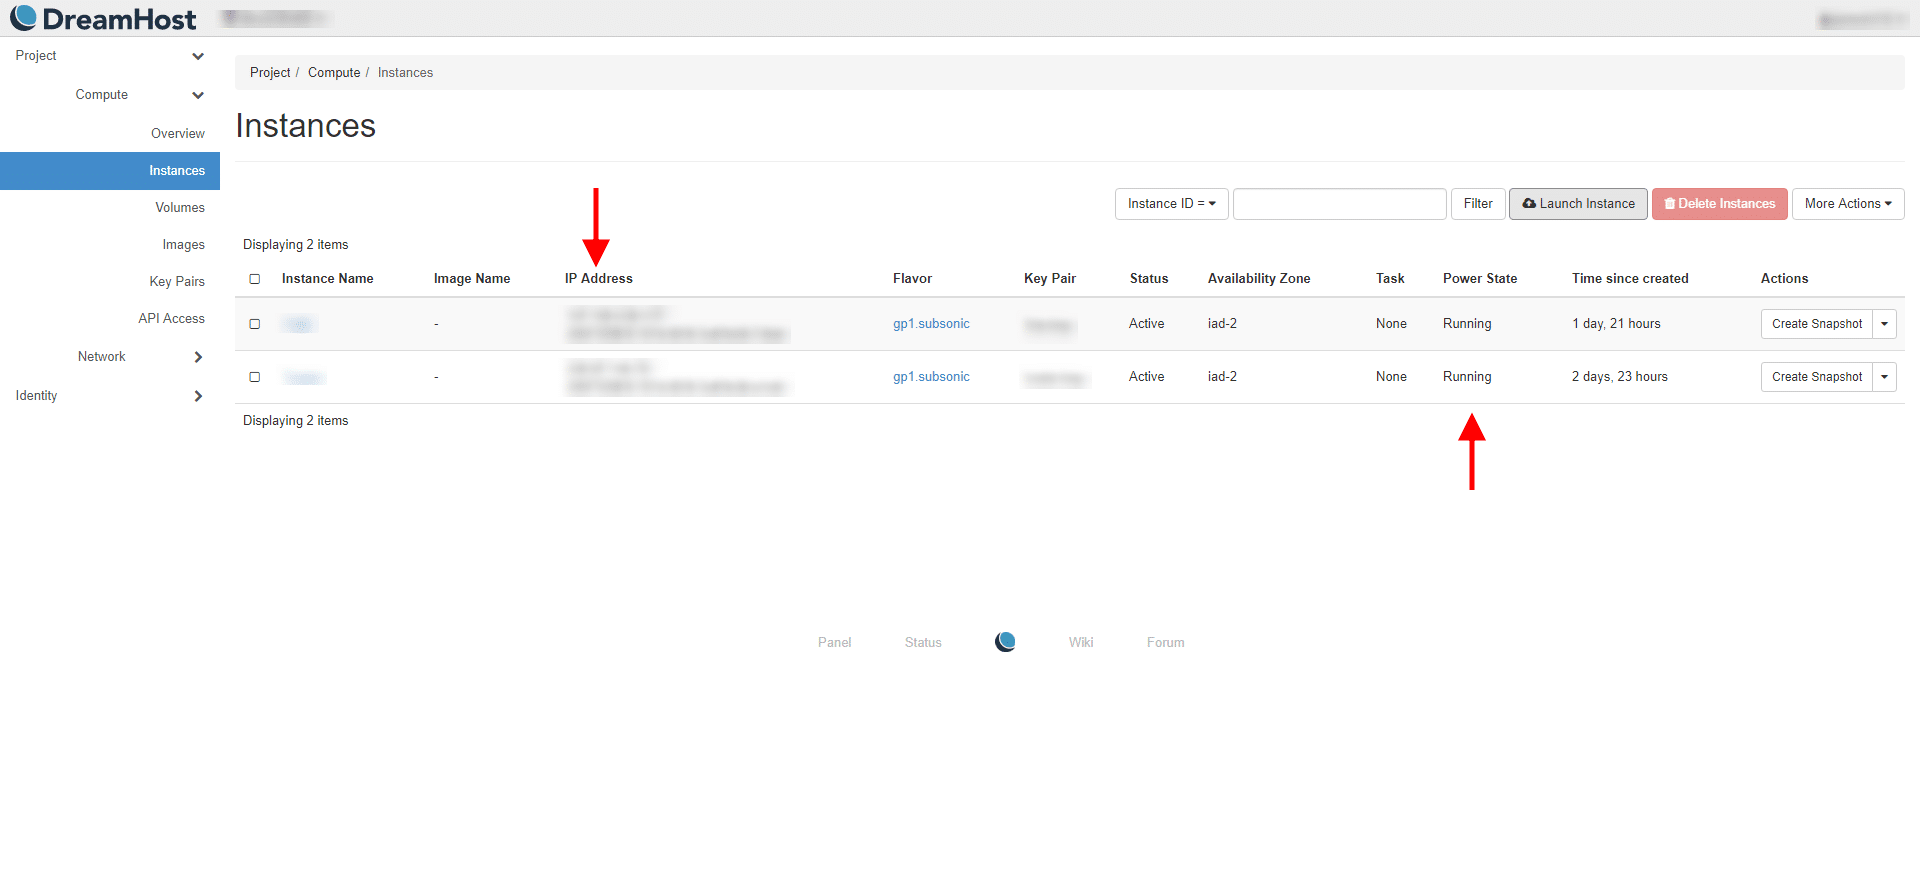
At this point, we are now ready to launch our Instance. Hit the Launch Instance button. The modal will close, and we will see our Instance under Instances. When the Power State status is Running, take note of our IP Address as this will be required, alongside the key pair to access our system’s Shell and SFTP.
We now have a running Instance on DreamCompute!


1 Comment
Pingback: Deploy Django to DreamCompute on Ubuntu with Apache – Part 2